Sunday, 23 September 2018

Statue of Liberty (21042) - Reaching new heights!

We made a big push on the build yesterday after having neglected it for a couple weeks. Not only did we finish off the "base" but we started on the structure of the statue itself though it doesn't look like much at this point.

 The 3rd level of the base continues with the familiar detailing and shapes that we have seen thus far. The corner columns are even taller with this level and there is another balcony/viewing area above.


Seeing the entire base together is quite impressive. Mom was excited to move from the beige brick to the tarnished green layers.


And here you can see the beginnings of the statue itself, starting with the structure around which it will be built.


Statue of Liberty (21042) - Another layer up

The set seems so simple and straight forward after the rigors of the DB5. It's almost as if the brain can go on autopilot instead of having to focus intensely on the task at hand!

The detailing on the set continues to be a pleasant surprise. We added the next layer to the base, this one with more detailing than the foundation. Where the brick detailing of the base came mostly from the patterns that were carved into the pieces, the detailing on this level comes instead from the use of many small, differently shaped pieces that were combined to give the overall effect.

Along the corners, you can see the use of alternating rectangular and circular pieces to provide the recessed column look while running along the base of this second level are alternating triangular and sloped pieces.


Again, the middle continues to be hollow. It's a good thing the hole extends all the way to the bottom as pieces simply tumble down onto the table when they get fat-fingered and dropped.


Tuesday, 4 September 2018

Statue of Liberty (21042) - Unveiling

As you may have guessed from the title, our next build is the Statue of Liberty! Thanks so much to Dave for this set. As we were working on the James Bond DB5 for him, he went on vacation to New York and was kind enough to pick this set up as a momento for us.

It's the first Architecture set that we have ever built and definitely an iconic one. At 1685 pieces, it's one of the smaller sets we have done.


Thus far, the build has gone very smoothly. After all the moving parts of the James Bond car, that isn't a surprise! I think this is a good breather for the intense concentration that was needed for that set!

We managed to get a lot of the foundation done over the weekend. The detailing is true to form and looks true to form.


The interior of the base is hollow, which will cut down on the finished weight of the set. I also appreciate the use of some colors with the internal pieces. The colors definitely help you to locate where additional pieces need to go and overall makes the build easier.


James Bond DB5 (10262) - Final Thoughts

Well, with the completion of the build comes time for reflection. Lego did a great job with this set. Visually, it looks very close to the real life version of the car. And the little tricks and gimmicks they included were well executed and true to the movies.

My favorite of the features has to be the ejection seat - the mechanics were cleverly integrated into the vehicle and work so smoothly. The seat gets some very impressive air when launched - it had to be at least a foot of travel.

Other neat gadgets include the extendable bullet shield, the hidden machine guns that rotate in and out with the running lights and the rotating license plate holders. I was also very impressed with the detail in the engine of the car.

If there is something I need to pick on as a critique, it is that the retractable roof segment does not sit perfectly flush with the rest of the roof. So, if you know what you are looking for, it's quite evident that there is something going on there. You can see in the picture below that there is a square that seems to be slightly elevated from the roof.


Aside from that though, this build is spot on. It's full of interesting gadgets and features and it is a MUST HAVE for any James Bond fan. Be aware that novice builders may have difficulty though. Lego wasn't joking around when they classified this as an expert set. As with many other builds that have a lot of moving parts, some portions of the build are tricky and if you aren't paying complete attention, it is very easy to miss something only to realize it later and have a lengthy fix ahead of you.


James Bond DB5 (10262) - Off the assembly line and ready for action!

This weekend proved to be a productive one as we finished off the James Bond DB5. I presented it to Dave not too long ago and he was thoroughly pleased with it!

Lego certainly saved the best for last as we got to build (and play with) the ejection seat. It launches the seat an impressive distance into the air! It's also very easy to reload the seat and reset the roof for the next unfortunate passenger.

A significant portion of the roof folds away, leaving lots of room for the seat and its occupant to take a little ride. The mechanics are very fluid - pulling back on the activation lever (which is cleverly hidden as part of the bumper) retracts the roof while pushing it back into position launches the seat into the air.


We also installed the tire shredders onto one side of the vehicle - they sure do look menacing!


This is going to look great on display at Dave's house. I can't wait to see pictures of it on his TV stand!

And Dave, remember that if you ever decide to expand your Lego collection in any way, we are happy to help you out! Tell your friends!

Friday, 31 August 2018

James Bond DB5 (10262) - The Hood and Trunk Go On

We did a little more work on this last, getting the hood and the trunk on. It is really starting to look like a car now!

Here is a shot from the front - clearly recognizable is the Aston Martin logo on the prow of the hood as well as the air scoop that runs down the middle.


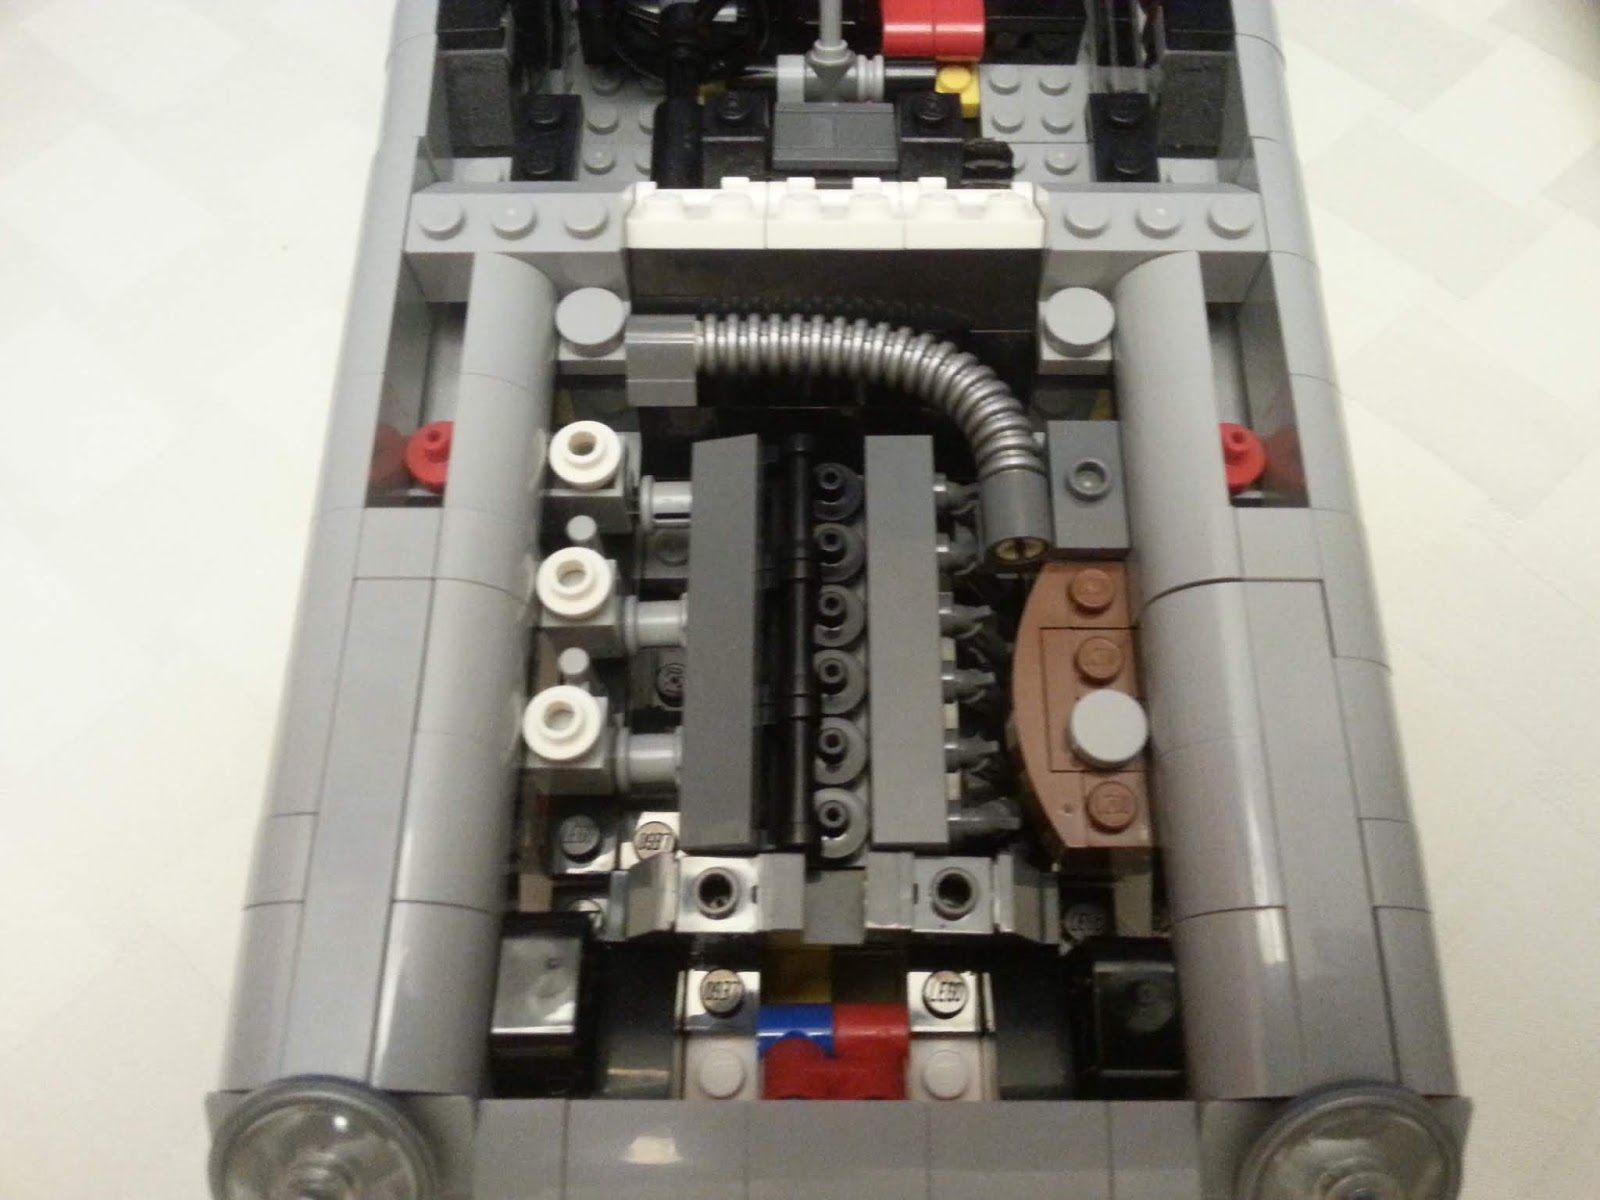
True to form to its real-life counterpart, the hood opens from the "back", swiveling at the front end. The opening and closing mechanism is very smooth and the hood stays open on its own.


We also did some work on the rear end of the car, getting the trunk in. Again the Aston Martin logo is prominently displayed.


As with the license plate holder on the front of the car, the one on the rear is also capable of flipping through all 4 of the plates. Below is a shot of it in mid change.


The trunk (or boot as the Brits would call it) is quite spacious. The only things currently in the trunk are 2 black pieces - I am not sure what they meant to be but they are the same pieces as those used on the machine guns. Perhaps they are replacement barrels?


Last but not least is the bullet shield - highly useful when Bond is being chased by the bad guys. With a clockwise twist of the right side "tailpipe", the shield extends to cover the rear windshield. Twist the pipe counter-clockwise and it retracts back into its slot.


Monday, 27 August 2018

James Bond DB5 (10262) - Engine, headlights and machine guns oh my!

This weekend's building unveiled more cool features of the Bond car. In addition to completing the engine compartment - which includes a pretty good depiction of the engine block, we also completed the front end of the car, including the grill and the running lights/machine guns.

As you can see, the engine compartment is convincingly packed with complex looking machinery. The engine even has the pistons showing and is a pretty good rendition of the inline-6 engine of the actual DB5 car. On the right side of the engine block, you can see the 6 headers of the exhaust manifold (again cannon to the real life DB5) and to the left are the 3 fuel filters and associated connections to the engine block. 

I certainly hope I have identified these components correctly as I am definitely not a gear head!


Next on the cool list are the running lights, which flip to reveal dual machine guns! Definitely handy in a villain chase! The flipping is accomplished using the gear shift lever by the driver's seat. Here is the car in "civilian" mode, looking perfectly harmless.


And then suddenly BAM! You've got twin machine guns spitting lead at you!


With that, we finished chapter 3 of the build. Chapter 4 is the last section, so expect a few more cool tricks that this car up its sleeve!